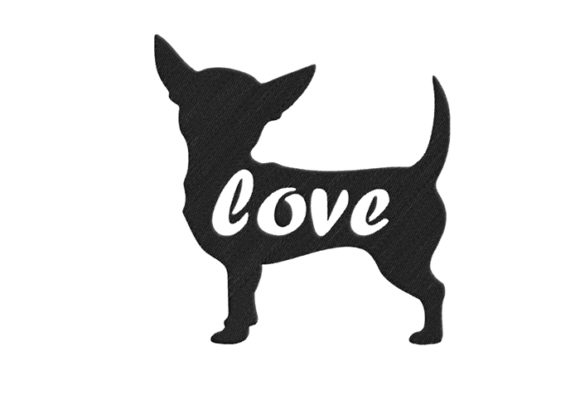
Chihuahua Silhouette
A Designer’s First Look: Clean, Confident, and Instantly Recognizable
When I opened Chihuahua Silhouette for the first time, I didn’t just see a dog outline—I saw a strong, compact shape with unmistakable breed character. The profile is sharp but not rigid: ears perked just right, muzzle tapered, tail subtly curved. It doesn’t try to be cartoonish or overly detailed—instead, it leans into confident negative space and balanced proportions. That makes it feel like a design built for real-world use, not just digital preview. I immediately pictured it on a linen tea towel for a boutique kitchen line—and knew it would hold up.
How It Performs on Real Projects (Not Just Screens)
I tested Chihuahua Silhouette on three very different items: a medium-weight cotton tote bag, a 100% cotton baby onesie, and a structured twill cap. On the tote, it stitched cleanly at the 4” size—no puckering, no thread breaks. The satin stitch along the outer edge stayed crisp, and the fill stitch inside held consistent density without looking heavy. On the onesie, I used the 2.5” version with tear-away stabilizer underneath and a light topping—no shadowing, no distortion, even with the fabric’s slight stretch. The cap was the real test: curved surface, limited hoop access, and tighter grain. With proper hooping technique and cut-away stabilizer, the 3” size retained its silhouette integrity—no smudging of the ear tip or tail curve.
This isn’t a design that demands perfection from your setup—but it *does* reward thoughtful execution. It shines in custom apparel, especially sweatshirt embroidery where bold, legible shapes read well from a distance. It also works beautifully as an embroidered patch (I stitched one onto denim with a simple border satin stitch), and holds visual weight on nursery decor like pillow covers or framed hoop art.
Where to Use It Thoughtfully—Not Just Everywhere
Chihuahua Silhouette is versatile, but not universal. Here’s where I recommend extra attention:
- Small hoop sizes: The smallest version is usable, but avoid going smaller than recommended—fine details like the inner ear contour can blur or vanish.
- Textured fabrics: Heavy terry cloth or bouclé will mute fine edges. Stick to smooth weaves unless you’re willing to adjust underlay or reduce density manually.
- Thin or sheer fabrics: Always pair with appropriate stabilizer—even lightweight tear-away helps prevent show-through on voile or rayon blends.
- Dark fabric backgrounds: The color chart included helps, but I still test thread contrast on black or navy first. Some lighter thread shades lose definition; switching to matte poly or slightly deeper tones improved clarity.
- Curved surfaces: Caps and baby beanies need careful hooping and possibly reduced stitch density in tight curves—especially near the ear base—to avoid distortion.
What It Adds to Your Handmade Product—and What It Doesn’t
Chihuahua Silhouette elevates perceived value without overcomplicating things. When stitched on a natural canvas apron for a local pet bakery, customers consistently paused to admire the clean breed recognition—not “a dog,” but that dog. That specificity builds trust: it signals care in curation, not just convenience. For Etsy sellers, that translates to better photo mockups, stronger branding cohesion, and repeat buyers who associate your shop with polished, intentional design assets.
It doesn’t add clutter. There’s no unnecessary scrollwork, no filler flourishes—just focused, scalable form. That makes it ideal for minimalist branding, monochrome collections, or holiday embroidery where you want warmth without busyness (think: a red-and-cream Chihuahua on a linen stocking). And because it comes in five sizes, you’re not forced into awkward scaling—each version feels proportionally resolved, not stretched or pixelated.
Practical Notes Every Embroidery Designer Should Check
Before stitching your first client piece—or listing your next handmade product—here’s what I do with every new machine embroidery design:
- Test on scrap fabric using the exact stabilizer, thread, and machine settings you’ll use for the final piece.
- Review stitch density in your editing software—if it’s dense near the ear or tail, consider reducing density by 5–10% for lightweight fabrics.
- Confirm hoop size matches your intended scale—don’t assume the 4” version fits your standard hoop without checking.
- Inspect small details at 200% zoom: does the inner ear line stay distinct? Is the tail tip fully closed?
- Try black-and-white mockups before committing to thread colors—some combinations flatten depth unexpectedly.
- Compare light vs. dark fabric backgrounds in your design preview tool. A thread that pops on white may disappear on charcoal.
- Use proper stabilizer—cut-away for knits and caps, tear-away for stable wovens, and fusible + topping for delicate or shiny fabrics.
- Verify licensing before selling finished items or bundling the digital embroidery file with other design assets. If commercial use isn’t explicitly confirmed, don’t assume it’s allowed.
Final Thought: A Design That Serves the Maker—and the Customer
Chihuahua Silhouette isn’t flashy. It doesn’t shout. But when stitched on a soft organic cotton baby blanket, it conveys quiet affection. When placed off-center on a heavyweight tote for a dog-walking service, it reads as professional and personable. It supports your craft business without overshadowing your voice as a maker. That balance—between recognizability and restraint, between simplicity and breed authenticity—is rare. If you work with personalized gifts, small shop products, or commercial embroidery for pet-related brands, this is the kind of embroidery file that earns repeat use, not one-off novelty. Keep it in your working library—not just your folder of “cute dog designs.”